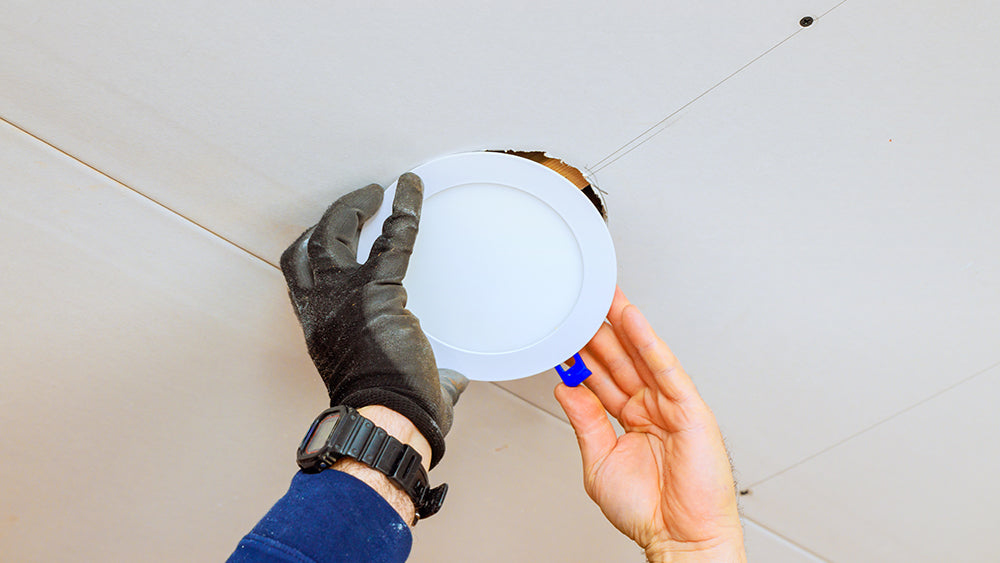
Recessed lighting for ceilings is becoming increasingly popular as a way to add elegant and polished lighting fixtures in a way synonymous with modern interior decor.
If you’re a homeowner or a business owner and you want that kind of sleek lighting finish then you’re probably looking for the best ways to add recessed lighting to the existing ceiling easily and affordably! You are in the right place!
In this article, we’ll guide you on how to add recessed lighting to your existing ceiling.
What is Recessed Lighting?

For starters, if this term is new to you then recessed lighting is simply a type of light fixture installed into a hollow space inside a ceiling so that light appears as though it is coming from a hole within the ceiling. The fixture is mounted into the attic space and only the decorative surface finish and the bulb are visible.
A recessed light consists of three sections: the fixture, trim, and bulb. The fixture is the body mounted inside the ceiling and contains the electrical connection and lamp holder. The trim is the decorative, thin lining around the edge of the light, and it comes in different shapes and designs. Finally, the bulb is the section that emits light.
When shopping for recessed lighting, you can choose can or canless lighting. Can lighting is traditional recessed lighting in which the housing is a separate entity from the bulb and trim. It contains electrical connectors and wiring that help power the bulb. This type of recessed lighting is suitable for new buildings.
Canless recessed lighting on the other hand comes as a unit that combines the housing, trim, and bulb into one fixture. It is installed as a unit and is often suitable for old homes or renovations because you don't need to cut large holes to install them in your ceiling. Furthermore, they utilize LED lighting, hence more energy efficient.
Can you Add Recessed Lighting to An Existing Ceiling?

The answer is yes! You can add recessed lighting to the existing ceiling!
Well, it would have been best for you to add recessed lighting during the initial installation of the ceiling but that doesn’t mean you can’t add recessed lighting to an existing ceiling!
Tip: You’re better off going for canless or remodeled fixtures which are specially designed for installation from below the ceiling.
How to Install the Recessed Lighting in the Existing Ceiling

This is now where we delve into the nitty gritty! Let's take you through how to add recessed lighting to the existing ceiling in just a few steps.
Step 1. Choose the type and number of recessed lighting
First, choose the best recessed lighting fixture for your space. You should thus keep in mind that the lights come in all different sizes, finishes, and styles. In this regard, you ought to factor in aspects like the type of bulb, its dimming capabilities, and the like.
In addition, it is a good choice to choose the number of lights that are suitable for the installation and buy them wholesale on the ComiLED website to enjoy more discounts. At the same time, you also need to consider the size of the room, the required brightness level, the height of the room ceiling, etc.
Step 2. Assemble your tools/materials and prepare the work area

The right tools will help do the heavy lifting for you. So, make sure you assemble the right tools and materials to seamlessly execute the task.
We do recommend that you find tools like a drill, dust mask, insulation tape, ladder, measuring tape, screwdriver, safety glasses, work gloves, pencil/marker, electrical cable, hole saw, recessed lighting fixture, wire strippers, voltage tester, and stud finder.
Well, depending on the nature of your ceiling and surface, you might need to find other specialized tools and materials to help you get this done.
Once you have assembled your tools, it’s now time to start preparing the work area to ensure that you execute it safely and seamlessly.
You can switch off the power from the main electrical panel and confirm it with a voltage tester. Tip: Remove any furniture and cover the floor if necessary to ensure it is not damaged by dust and other debris as you undertake the installation.
Step 3. Cut Ceiling Holes
To begin with, pick the stud finder from your assembly of tools and use it to locate the ceiling joists. Make sure you mark these locations with a pencil or a marker. Now, decide the suitable locations for your light and ensure they are at least 6 inches away from the joist.
Next, trace the outline of the fixture housing on your ceiling then cut the holes with a drywall saw or hole saw.
Make sure the measurements are correct to ensure accurate fitting and prevent unnecessary adjustments or patching that can affect the quality of your finishing.
Step 4. Mount the Fixture Housing
Before mounting the fixture into position, insert the relevant electrical cables through the knockout in your fixture housing. Fix the cable connector and also pull the power source cable to the first fixture. Slowly insert the housing into the ceiling hole.
Make sure you follow the stipulated manufacturer’s instructions on how to fix the housing onto the ceiling joists. Generally speaking, you’ll use something like mounting clips or bars to brace against the joists and hold the fixture firmly. You can do the same for the other fixtures.
Step 5. Connect the Fixtures
Now, connect the electrical wires from the power source to the first fixture housing. Cab this connection with the connectors and link them to the next fixture until all the fixtures are connected. Make sure you match the live, neutral, and earth wires to avoid short circuits that can cause a fire.
Also, wrap the exposed wires with electrical tape and secure the connections with the help of a wire nut. Again, don’t hesitate to speak to a qualified electrical technician to help with the process if you aren’t that savvy with the installation process.
Step 6. Mount the trim and bulb
When you are done with the wiring, gently push the trim into the fixture housing until it aligns and flushes with the ceiling.
Now, get the bulb and also insert it into the socket. Ensure you follow the manufacturer’s recommendation for the respective wattage and type. Do this for the rest of the other fixtures.
Step 7. Test the Lighting
Now that you are done with the installation, it is time to test whether the lights are working correctly and whether you have achieved your desired lighting effect. Check that they are properly aligned and if necessary, adjust the placement to achieve the desired effect across your room.
Tips on installing the recessed lighting

There is no one-size-fits-all solution for installing recessed lighting. That said, let’s take a sneak peek at some of the tips on how to install recessed lighting the right way:
- If there is any insulation present, consider IC-rated recessed lights because they don’t overheat in these conditions.
- Dress your fixtures with the right trim because the choice of your trim affects the amount and type of light from the fixture.
- Space your fixtures correctly. Often, it is ideal to place them 4-6 feet apart.
- Ensure the light temperature matches your room’s purpose. For example, if you are installing recessed lights in your living room or your bedroom, go for warmer lights, that is 2700-3000K. Otherwise, if you are doing recessed installation for your kitchen or offices or simply task-oriented spaces, you’re better off going for cooler lights.
- Of course, you should use the right tools and quality materials. This will make your installation process super smooth!
- Speak to a good electrician near you to ensure that your installation is safe and up to the stipulated standards.
Conclusion
In conclusion, adding recessed lighting to an existing ceiling is possible and it's that easy! The best place to start though is to go for recessed lighting options. In this regard, you can shop around for the right fixture.
Once you have the right product then it’s time to follow the steps we’ve highlighted to effectively install recessed lighting on your existing ceiling. You can also engage a qualified electrician to help you with the installation process.
Click to learn: How to Change a Lightbulb in a Recessed Light.


Share:
Can vs Canless Recessed Lighting: What Are the Differences?
How to Add Recessed Lighting to the Existing Ceiling?