When it comes to adding a sleek and modern touch to your interior space, one lighting option that comes to mind is—recessed lighting. This lighting option is favored by many people because it provides efficient illumination.
The good thing about recessed lights is that they are highly versatile. You can use them when renovating your rooms. You can also use them for other applications, such as building an interior space from scratch. They'll enhance your atmosphere and provide you with efficient lighting, without cluttering your ceiling with bulky fixtures.
In this blog, we’ll walk you through the steps to properly install recessed lighting. Whether you're installing Can Lights or Canless Lights, we’ve got you covered with detailed instructions to help you complete the task safely and effectively.
What Is Recessed Lighting?

Recessed lighting is a type of light fixture that you can install into your ceiling. The good thing about this lighting option is that it's effective for concealing the light bulb and the housing. Instead of cluttering the ceiling, the light bulb and housing are installed to sit flush inside the ceiling.
Recessed lights are often housed in cylindrical or pot-shaped enclosures. This explains why they are also called "can lights" or "downlights". This lighting option is ideal for both residential and commercial spaces. You can place it in your bathrooms, kitchens, hallways, or living rooms.
Why Should You Install Recessed Lighting?

You may be wondering, why exactly should I consider installing recessed lighting in your indoor space. Well, to answer this question, we’ll say having recessed lights in your home comes with many benefits. Below are a few ways recessed lighting can transform your space today:
- This lighting option offers a sleek and minimalist design. The bulbs and housing will sit flush in your ceiling. This design is ideal if you don't want lighting elements to clutter your ceiling.
- Another good thing about recessed lighting is that they don't come with bulky fixtures. Sunlight pendant lights and chandeliers, this option will never occupy visual space.
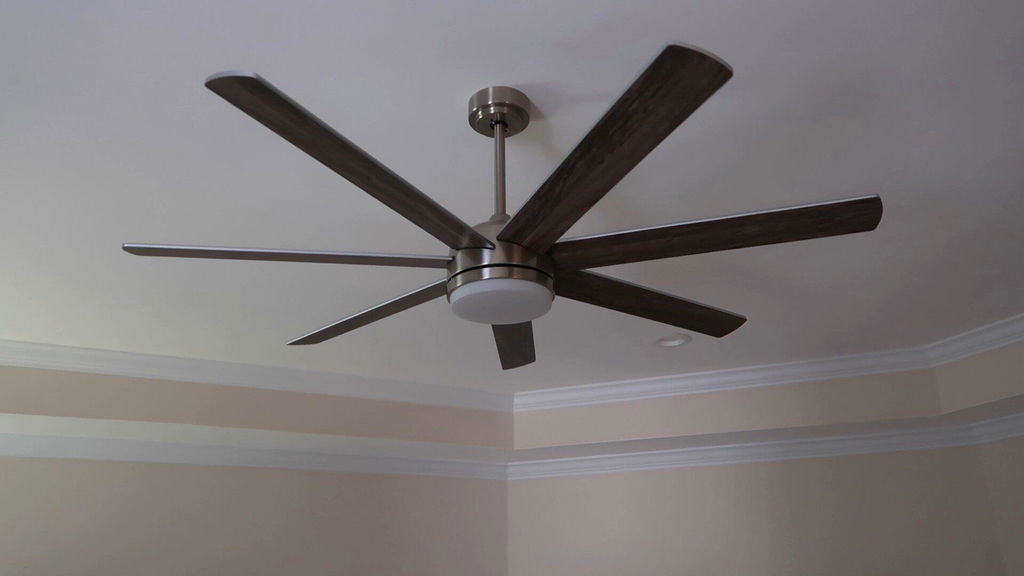
- Furthermore, recessed lighting is versatile and perfect for different applications. You can install the lights in any room in your home—bathrooms, kitchens, living rooms, and bedrooms.
- Another thing you'll like about recessed lighting is that you can always customize them to meet your taste and preferences. You can strategically position the lights to highlight specific areas in your home.
- Recessed lighting is also perfect for highlighting your key properties.
How to Install Recessed Can Lighting?

Before installing recessed lights, you need to factor in a few things, such as:
- Circuit
- Choosing the right fixtures
- Understanding the cost of recessed lighting installation
- Permits
- Safety consideration
- Equipment/tools
Step 1: Wiring & Locating a Circuit
The first crucial step in installing recessed lights is planning where to place them. This requires understanding the exact spots where you want the lights to be installed. For example, if you're installing lights in the kitchen, you'll want to position them above key areas like the stove and sink. This is just one consideration in your planning process.

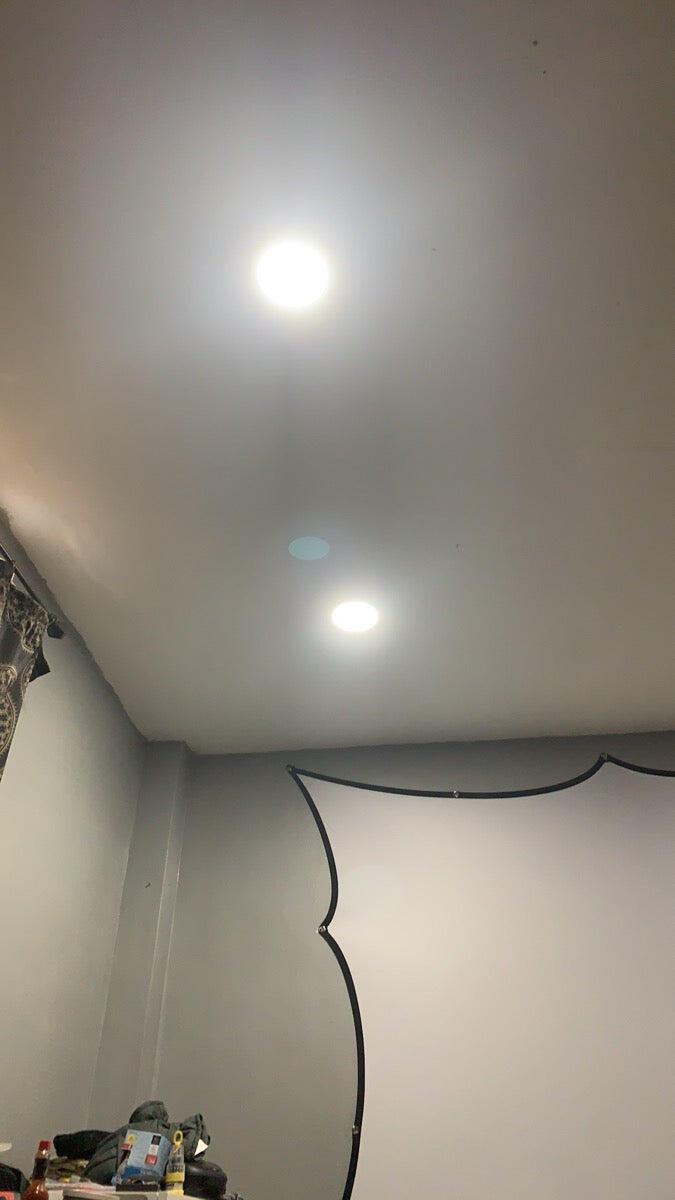
Next, consider the ceiling height and the spacing between each light. A simple way to determine the correct spacing is to divide the ceiling height by two. For instance, if your ceiling is 10 feet tall, your recessed lights should be spaced about 5 feet apart. Also, avoid placing lights too close to the edges of the ceiling. Once you've identified your desired placement, make sure to mark those spots.
Now, it's time to locate the wiring routes. If your home already has existing wiring, this step will be much easier. Check the attic for spare circuits or examine faceplates for live circuits.
If no existing circuit is available, you will need to run new wiring. Start by running the electrical cable from your service panel to the switch. From the switch, extend the cable to the first recessed light, and then continue wiring to connect additional lights in a series.
Step 2: Selecting the Right Fixtures
You have many options when it comes to choosing the right fixtures for the installation process. You can buy old-work or remodel recessed lights. These lights don't need to be secured to the joists. Instead, all you need is to attach them to the drywall of the ceiling.
If you're looking for energy-efficient options, consider exploring wholesale LED lights. If your ceilings have insulation, it's best to buy IC-rated lights. You should only choose non-IC-rated recessed lights if they have clearance around and above the housing in the ceiling area.
Step 3: Getting the Necessary Tools and Materials for Installation

Below are a few tools necessary to carry out the recessed light installation:
- Wire ripper
- Wire stripper
- Tester for voltage
- Hole saw
- Stud-finder
- Side-cutting pliers
- Breathing protection
- Eye protection
You also need the following materials to get the installation job completed:
- Cable
- Recessed lights (remodeled or old-work models)
Step 4: The Installation Process
To install your lights, below are a few steps you need to follow:
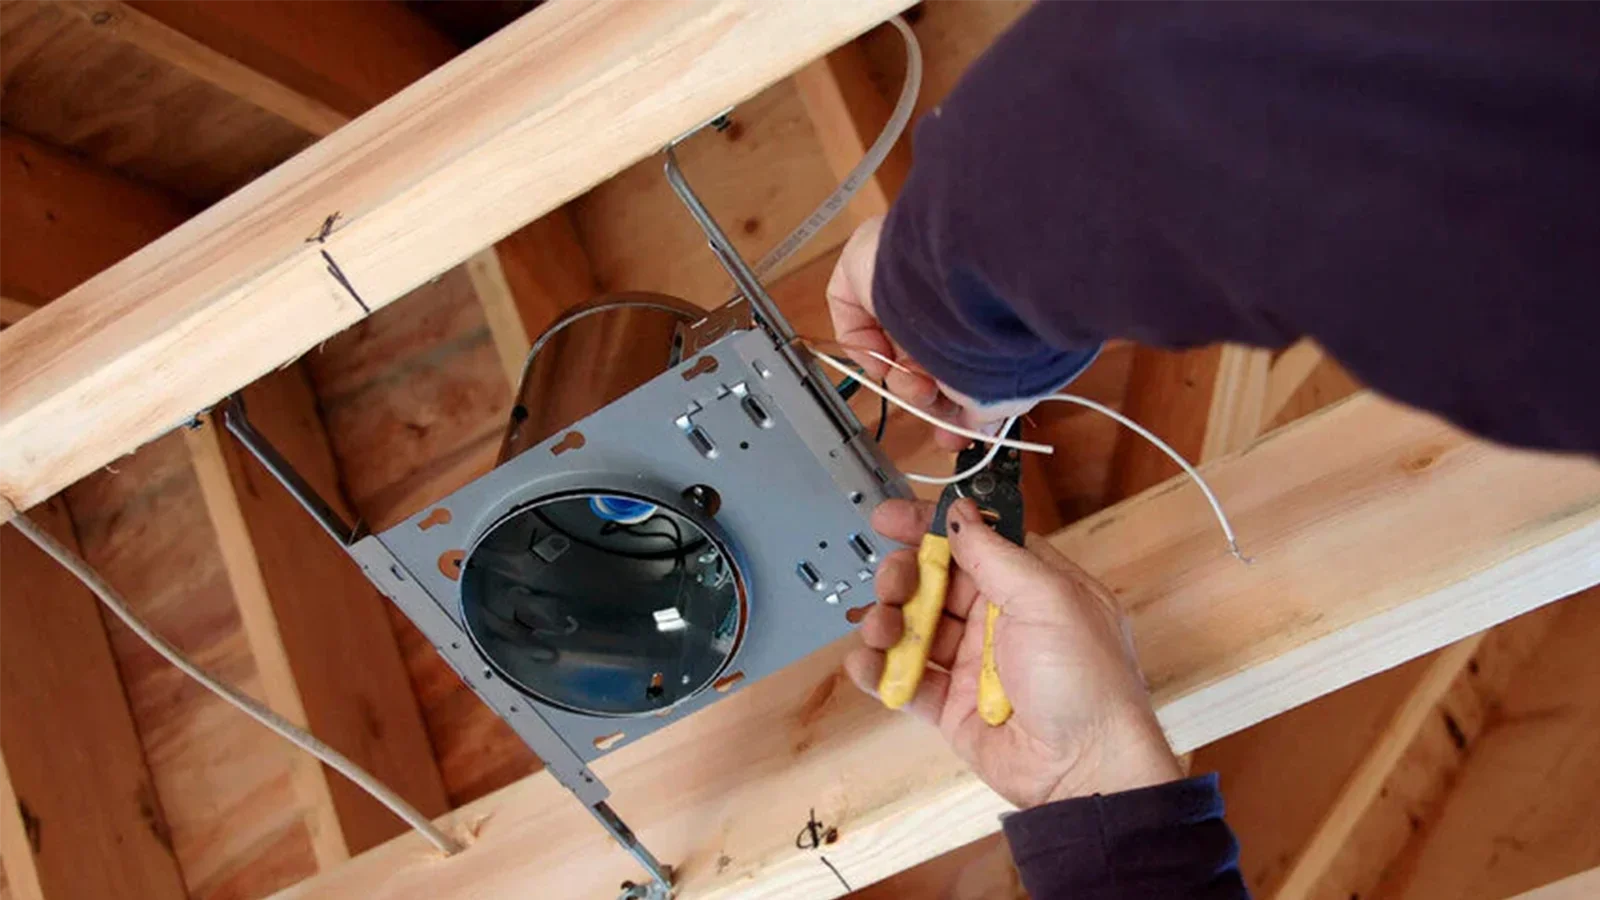
● Start by cutting the hole in the ceiling. Ensure to wear your eye protection during the cutting process. Furthermore, the spacing between the hole and the joist matters. Use your stud-finder to ensure the spacing is at least 6 inches apart. Mark the planned area and then use your jab saw to cut along the mark.
● Run the cable accordingly, depending on what you have on the ground. Is the wire coming from its circuit? If yes, consider pulling the wire down through the hole. If the wire is coming from another recessed light, then try opening the junction box of the existing light. After that, attach the wire accordingly. If you have a standard electrical ceiling box, consider removing it when installing the recessed light.
● Next, consider attaching the wire to the recessed light. Use your wire ripper to rip off about 4 inches of the sheathing. You should also rip the sheathing and then connect the wires into the junction box, accordingly.
● Once the connection is made, consider pushing the light up into the ceiling hole. Ensure that the lights fit perfectly (not too tight) into the hole.
● Next, consider adding the recessed light trim if the lights you have don't have any trim attached. After that, add the right bulb.
● Lastly, consider wiring the circuit to the service panel. To do this, you need to pull the electrical cable into the panel. Connect the wire accordingly to the circuit breaker. After that, attach the breaker into a free slot on the electric service panel.
How to install recessed canless lights?

As with can lights, you also need the aforementioned tools and materials. Once you have everything ready, you can proceed by following the steps below:
Step 1: Determine the light placement
To get started with the recessed canless light installation, you need to first plan the layout. Carefully consider the perfect spots to position your lights. In addition, you need to ensure proper spacing between the hole and the joist.
Step 2: Turn off Your Power source
Before proceeding with the installation, ensure to turn off the circuit breaker. This is crucial to avoiding electrical issues.
Step 3: Borehole in Your Ceilings
Use your jab saw to cut openings in your ceiling. These holes are crucial to installing the recessed lights.
Step 4: Run Wiring
After boring holes in the ceilings, consider running an electrical cable to the hole. You can do this using fish tape. Pay attention. To the routes when running wiring to the holes.
After that, consider using wire connectors to join the house wiring to the wires of your light fixture. Ensure to match the colors, accordingly.
Step 5: Connect the Bulbs
Push the fixture into the hole and clip it accordingly to the ceiling. After that, insert the lights. Restore your power to test the lights. If need be, you can adjust the lights accordingly for proper connection.
In all these, ensure to follow your local codes during the installation process. If necessary, you should also get a permit before proceeding to install the recessed lights. If you're unsure about the entire process, you can always speak with a professional near you.
Placement & Spacing Tips for Recessed Lighting

In case you missed out on the placement and spacing guide above, here are some tips for you:
For general placements, you need to start by creating the appropriate space light. The ideal space should be half the height of your ceiling. Furthermore, when placing the lights, make sure to avoid corners and walls. You can do this by positioning the lights at least 2-3 feet away from the walls. This helps to prevent harsh light spots. For the best results, ensure to position the lights where they really matter in your interior space.
For specific spacing tips, you need to start by considering the room’s purpose. For kitchens, closer spacing is required. However, you need wider spacing if you're installing ambient living room light. Furthermore, consider having enough space if you're using bright bulbs. For lower-wattage bulbs, however, make sure the lights are closely placed.
Conclusion
Installing recessed lighting not only improves your home's aesthetics but also offers a modern lighting experience. From choosing the right fixtures to proper installation, attention to detail is key for safety and effectiveness.
If you're unfamiliar with electrical work, it's best to consult a professional. Whether opting for can lights or canless lights, recessed lighting is a stylish and efficient solution that brightens and enhances your space. Prioritize safety during installation and follow local codes for the best results.
FAQs
1. How Much Does It Cost to Install Recessed Lighting?
On average, it costs between $20 to $500 per light for installation. Of course, this figure also depends on if you’re using a DIY approach. You may spend up to $2,000 for four light fixtures if you're using a professional electrician. To get a more precise estimate for your specific needs, check the cost of installing recessed lighting.
2. What Is the Difference Between Can Lights and Canless Lights
Canless lights, especially LEDs, help to save space on the ceiling. Besides, many homeowners favor them because they lower maintenance.
Canned lights, on the other hand, require complex wiring, trim, and housing issues. You only need a hole in the ceiling and simple wiring to complete your recessed canless light installation.
3. Why Consider Recessed Lights for Your Home?
Recessed lighting can add value to a house in several ways. These lighting elements can enhance your home's aesthetic appeal, providing both modern and functional lighting. Additionally, recessed light installation can help create a clean, spacious look.
If you're considering options for specific areas, explore some hallway lighting ideas for your home to make the most of your space.

Share:
What Are Types of Recessed Lighting?
What Are Lights on the Nightstand Called?