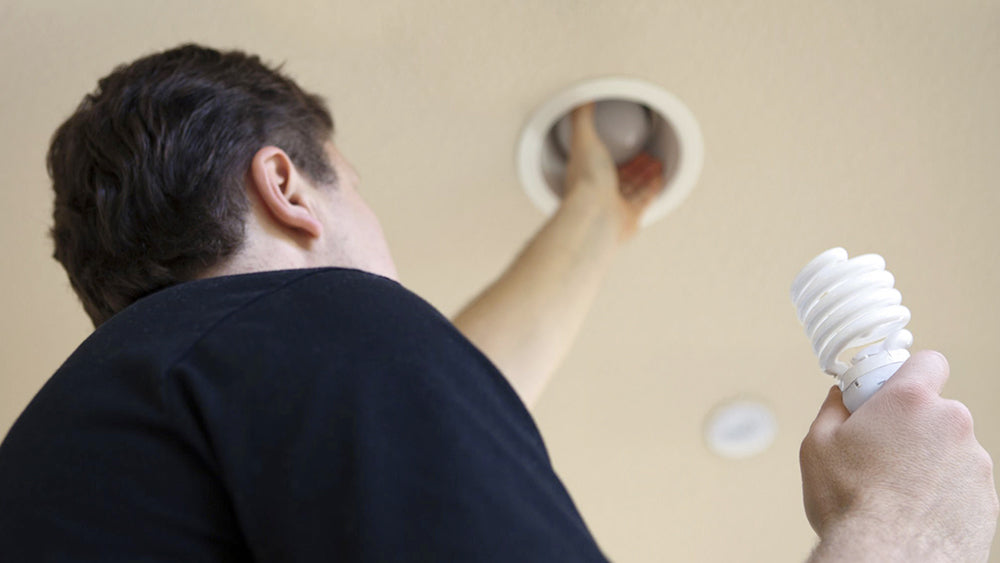
There are definite advantages to using an LED recessed light, but, as with conventional lights, eventually, the light bulb has to be replaced, when you reach this point, you might wonder how to go about safely and efficiently switching your old recessed light bulb with a new one.
If you don't know the specific replacement steps, don’t worry! Here is a walkthrough of the basic info you need to know about changing the light bulb in a recessed light.
Why Change the Recessed Light Bulb?

Isn’t improved energy efficiency and longer lifespan one of the major benefits of LED recessed lights? So what’s the reason you need to change a recessed light bulb anyway?
There’s no doubt that LED bulbs burn for much longer than classic incandescent bulbs, but they still use up their energy and suffer from a brightness loss over time. Don’t be surprised if these bulbs burn out sooner than expected due to overheating or moisture exposure. If you’re looking for more durable and efficient lighting options, check out our guide on best-recessed lighting to find the ideal upgrade for your space.
Gather the Necessary Tools

Make sure you have the tools you need before you change the light bulb in your recessed light, including:
- Ladder (if the light fixture is mounted high)
- Screwdriver (some light covers may need to be unscrewed)
- Gloves (avoid direct contact with the light bulb to prevent burns or fingerprints)
- The right new light bulb (confirm the wattage, size, and base type match)
Once you are ready, you can follow the detailed steps below:
How to Change a Lightbulb in a Recessed Light? Step-by-Step
Now that you have all your tools, you can replace the light bulb in your recessed light. This process can be broken down into five simple steps.
Step 1. Turn Off the Power
It is indispensable for safety purposes that you turn off the light for your recessed lighting unit and also shut off electricity to the unit entirely! Do this by turning off the power at the circuit’s breaker panel.
After turning off the power, you need to wait for the bulb to cool down, especially for halogen bulbs or high-power bulbs, to avoid burns. If you are not sure whether the power is completely off, you can use a test pen or voltage tester to check whether the lamp holder is energized.
Step 2. Remove the Light Fixture Cover

You need to remove the housing cover before replacing the LED light bulb on your recessed light.
Luckily, this is a simple step. Reach the cover with your ladder and, with your fingers, pull the cover down. You can also use your screwdriver to attempt to pry the cover loose if the cover is hard to pull down.
Some lamps are fixed with spring clips. Gently pull the lampshade down, find the spring clips on both sides and press them to disengage them from the slot. It should be noted that during the removal process, please hold the lampshade with both hands to avoid sudden loosening and damage or falling.
Step 3. Remove the Old Bulb

Before removing the old bulb, you should prepare a clean cloth or rubber gloves in advance, hold the bulb, and twist it counterclockwise to unscrew it (screw-in bulb).
If it is a snap-on or plug-in bulb (such as GU10, MR16, etc.), you need to hold the lamp holder and gently twist or pull out the bulb. Check the lamp holder and bulb interface to make sure there are no dust or burn marks. If there is dust, wipe it with a dry cloth.
Tips: If the bulb is damaged, be sure to wrap the fragments with paper towels or cloth and clean it carefully to avoid glass cuts.
Step 4. Install the New Bulb

Take your new bulb (and make sure it is the same wattage and size as the old one!) and hold the bulb with a clean cloth or rubber gloves to avoid oil on your fingers that may affect the life of the bulb.
Then align the new bulb with the lamp holder and carefully insert it or tighten it by turning it clockwise. Make sure the bulb is firmly installed, but do not use too much force to avoid damaging the bulb or the lamp holder.
Step 5. Replace the Cover
After installing the new bulb, you can align the lampshade or decorative ring with the lamp and install it back in the original way:
- If there is a spring clip, compress the spring first and then push it into the slot.
- If it is fixed with a screw, tighten the screw again.
Check that the lamp is secure and ensure it is neither loose nor tilted. Turn on the power switch and circuit breaker to test whether the bulb is working properly. If the bulb does not light up, it may be installed improperly, there may be a power problem, or the bulb is damaged. You can try to reinstall or replace the bulb.
Safety Tips When Changing a Lightbulb in a Recessed Light
To guarantee ultimate safety in changing the light bulb of your recessed lighting, you will need to focus on two extremely significant areas, which are electricity and heat.
Taking all possible steps to avoid an electric shock is the top safety priority here, so you need to both turn off the light switch for the unit and cut off power to the circuit. For that last part, you can access the breaker panel for the circuit and flip off the power there.
Heat is also something to keep in mind when you change the bulb. Prevent damage to your hands by giving the bulb plenty of time to cool off and wearing gloves when you change it.
Why Choose the ComiLED Recessed Light?

The recessed lights offered by ComiLED provide a set of advantages that can enhance your home’s lighting situation.
There are, of course, the general pros that come with all LED lights, no matter if that’s a recessed light or an LED panel light. Higher energy efficiency, a much longer average lifespan, better safety conditions (due to reduced heat), and environmental friendliness are all factors to weigh here.
By that same token, ComiLED’s recessed lights also give you a modern, aesthetically sleek design with an affordable price tag. These lights additionally come in several varieties, such as 5CCT recessed lights, smart recessed lights, and fire-rated recessed lights.
FAQ
1. Is Changing a Recessed Light Bulb Easy?
Replacing a recessed light bulb is not typically too difficult to accomplish. It is roughly the same level of difficulty as changing an incandescent bulb. Though there are a few differences, the main process of turning off the power, removing the fixture cover, taking out the old bulb, and putting in the new one is the same.
2. What if the Bulb Cannot be Unscrewed?
You can first wear non-slip gloves to increase friction or use rubber pads or wide tape to assist in rotation. If the bulb is broken, don't just pick it out with your hands. Use pliers to hold the base and slowly twist it out to avoid scratches.
If it still can't be twisted, it may be rusty or too tight. Try spraying a little lubricant around the lamp holder and wait a few minutes before trying to twist it.
3. Are LED Bulbs Suitable for Recessed Lights?
Yes, but make sure the size, wattage, and lamp holder match. LED bulbs are more energy-efficient than halogen lamps, and use less wattage for the same brightness, which is more economical in the long run.
If your lamp originally used halogen lamps, you may need an additional LED driver, otherwise it may flicker or be incompatible. Before purchasing, it is best to confirm that the lamp supports LED light sources.
Hot articles: How to install recessed lighting?


Share:
Which Saw Is Used for 6” Recessed Lighting?
Can vs Canless Recessed Lighting: What Are the Differences?