
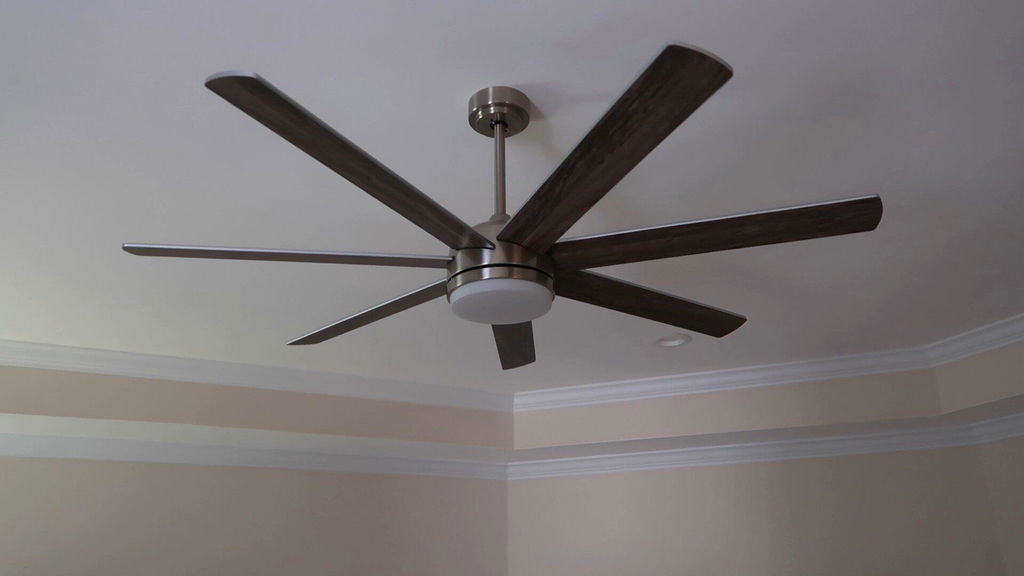
Will you install a ceiling fan system in your home? A ceiling fan with light that contains lights allows both improved air circulation and better lighting in the same space. The combination delivers notable savings because it decreases energy usage for lighting and air conditioning.
However, installing a ceiling fan can be tricky, especially if you're unfamiliar with the process. Skipping steps or misinterpreting instructions can lead to safety hazards. This guide will walk you through a smooth, hassle-free installation, ensuring your fan and light fixtures are set up correctly.
Tools You'll Need:
- Voltage tester
- Phillips and flathead screwdrivers
- Wire strippers
- Wire nuts
- Electrical tape
- Ladder
Materials You'll Need:
- Ceiling fan with light kit
- Mounting bracket
- Screws and anchors

After preparing these tools and materials, you can follow the steps below to install your ceiling fan with light.
Step 1: Turn off the Power

Starting any work requires you to switch off the electric supply for safety purposes before the installation of your ceiling fan with light; conduct a zero reading check on the voltage tester to verify the power is off and confirm the area has no current presence.
Step 2: Remove the Existing Fixture
Next, you must remove the existing ceiling fan and light fixture. Begin by taking off the cover plate to reveal the wires without damaging them or removing the mounting box.
Step 3: Determine the Wiring Layout
First, determine the type of wiring in your ceiling to understand the situation. Below is the wiring found in most household ceiling fans with light:
- Black wire: controls the fan.
- Red wire: controls the light.
- White wire: neutral wire.
- Bare copper wire: ground wire.
If you have a switch that operates both the fan and the light fixture together as one unit in your room or space, you might require either a remote control device or a pull chain mechanism to manage and adjust their functions accordingly.
Step 4: Secure the Mounting Box
Before installing a ceiling fan with light, you must securely attach the mounting box to the ceiling joist or truss using a metal box. This will provide stability and support so that the fan can be properly attached despite its weight.
Step 5: Attach the Mounting Bracket
Once the ceiling fan with lights mounting box has been securely fixed in position, attach the mounting bracket next. Insert the screws into the bracket. Allow them to dangle an inch. This bracket must be positioned accurately to secure the fan post-installation. Gently guide the wires through the bracket center. Push and tighten the screws into place.
Step 6: Mount the Fan and Light Base

Now that the ceiling fan with lights mounting bracket is securely in place, install the fan and its base. This step requires everything to fit snugly into place.
First, feed the wires through the collar for this first step of installation. At the top of the base, there's a small piece that needs to be positioned before sliding the collar onto the base.
The collar includes a specific hole that matches an existing screw installed on the mounting bracket. As you complete the wiring connections for the ceiling fan with lights, the screw in the hole will help keep everything in position. This is until everything has been connected. If you're considering additional commercial lighting solutions, ensure compatibility with your ceiling fan setup.
Step 7: Wiring the Fan and Light.

Wiring the ceiling fan with light steps:
- Connect the blue wire to the red wire of the ceiling fan with light. Secure them together and secure them with a wire nut on top.
- Connect the white wire to the other white wire of the ceiling fan with light, twist them together, and secure them using a wire nut.
- Connect the black wire of the fan to the white wire left of the ceiling fan with light. Twist them together, securing them with a wire nut for proper installation.
- Connect the grounding wire (green) to the copper wire of the ceiling fan with light and twist them together, securing them with a wire nut for proper installation.
Make sure the connections are secure and use wire nuts to keep them in place. Remember to wrap electrical tape around exposed wire bits to prevent shorts. Now your ceiling fan with light is properly wired!
Step 8: Secure the Base and Canopy
After completing the wiring installation process of the ceiling fan with light you need to secure the fan base, with screws placed at the corners of the base through the mounting bracket, securely tighten them in place, push up the canopy ring towards the ceiling, and rotate it to lock it in position.
Step 9: Attach the fan blades

Now we can attach the fan blades to the ceiling fan with lights motor by screwing them in place into the designated holes and ensuring a fit for security; some fans may have blades that snap into position. Listen for a clicking sound to verify their attachment. To ensure smooth operation, it’s also a good idea to check and balance your ceiling fan after installation.
Step 10: Install the Light Kit
The last step to complete the base installation of your ceiling fan with lights is putting in the light kit. Pull the wires through the kit and attach them to the fan base securely with screws and connect the wire connectors properly. Remember to link the wire from the kit to the white wire from the ceiling and the white wire to the black wire from the fan.
Step 11: Install the Light Bulbs and Lens
After installing the kit in its position, screw the light bulbs into their designated sockets first before carefully placing the lens cover on top and aligning the two notches of the kit with the screws before twisting it to lock it securely in place.
Once the fan and lights have been installed, it is time to ensure its functionality and to determine if it perform properly, and how it should be. That said, before testing the fan, ensure you put the power supply circuit breaker switch in the on position to activate the power supply. Now you can test your switches. If all devices are installed properly according to the instructions provided, your ceiling fan with light should run smoothly and provide effective lighting.

Conclusion
Installation of a ceiling fan with light might appear intimidating at first, but with the correct tools, a manual, and a step-by-step approach, many individuals accomplish it.
Now that you’ve successfully installed your ceiling fan with light, why not explore more lighting solutions? Visit ComiLED’s website to find high-quality electrical boxes and installation guides for a safer, more efficient setup.
FAQ
Can I Install a Ceiling Fan With a Light Without a Mounting Box?
No. A secure mounting box is essential for stability and safety. Installing a fan without one can lead to structural and electrical hazards.
What Should I Do if My Ceiling Fan Wobbles After Installation?
Check if the blades are balanced and tighten all screws. You can also use a blade balancing kit if necessary.
Can I Use a Dimmer Switch With a Ceiling Fan Light?
Only if both the fan and light are dimmer-compatible. Using an incompatible dimmer switch may cause flickering or damage the fan’s motor.
Click to learn: What size ceiling fan for the bedroom?

Share:
What Size Ceiling Fan Do I Need? Best Guide for Every Room
Which Saw Is Used for 6” Recessed Lighting?