Learning how to change a light switch is a great skill for any homeowner or renter. Whether it's for a new look or if your switch is worn out, a new switch improves the functionality. Most people can do this themselves with some basic safety measures and a few simple tools. We will show you how to switch a light switch in this guide. Let's dive in.
Changing a light switch is not only about restoring functionality—it’s often part of a larger lighting upgrade. Many homeowners pair new switches with modern recessed lighting or LED panel lights to enhance both efficiency and aesthetics.
When Does a Light Switch Need to Be Replaced?
Light switches are an essential element of your home's electrical system. Like anything else, they can wear out. Knowing how to detect a defective switch is crucial in maintaining safety and function.
Flickering or Delayed Lighting
If the lights flicker or take a long time to turn on, it can be a sign of worn out internal contacts or loose wiring around the switch itself. Consistent problems indicate that the switch itself is failing, and for both safety and consistent lighting, it's time to replace it.
Unusual Sounds: Crackling or Buzzing
A working light switch makes no sound at all. Crackling, popping, or buzzing during operation indicates internal arcing or failing parts. These are danger signs and the switch must be replaced immediately.
Heat or Burning Smell
Your light switch should be cool to the touch. If it's hot or smells like it's burning, the motor is overheating due to electrical failure or internal damage. This is already a fire hazard and should be replaced as soon as possible.
Physical Damage or Discoloration
If you see obvious signs such as cracks, scorch marks or discoloration on the switch plate, you're dealing with a damaged or overheating switch. These physical imperfections result in compromised safety and function requiring the immediate replacement of the switch.
Loose or Wobbly Switch
A switch that feels floppy or doesn't sit tightly in place might have worn internal action. This slack can result in improper operation and possible electrical hazards, which indicates it's time for a new one.
Frequent Circuit Breaker Trips
If turning on a specific switch causes the circuit breaker to trip every time it may be due to a short circuit in the switch or wiring. This persistent problem will require us to disassemble and possibly replace the switch to prevent inconsistent electrical performance.

Advanced Instructions for Replacement
Before swapping out a light switch, it's important to take proper safety precautions and prepare accordingly. The pre-replacement tips below will help ensure a safe and easy procedure for everyone.
● Switch off the power from the circuit breaker that is connected to the light switch you're replacing.
● Test the power supply is off by flicking the switch.
● To avoid electric shock, wear rubber-soled shoes and safety gear, such as insulated gloves and safety glasses.
● Prepare all the tools you need, such as screwdrivers, wire strippers, pliers, and a non-contact voltage tester.
● Determine the kind of switch (single-pole, three-way, etc.) you need.
● Note your existing wiring or take a picture of it before you disconnect anything.
● Ensure that your intended work follows local electrical codes and that you pull any required permits.
How to Replace a Light Switch
Replacing a light switch is a pretty manageable DIY task when you approach it with caution and have the right tools. Here is a guide for a safe and smooth replacement process.
Turn Off the Power
● Find your home's circuit breaker panel, which is typically in a garage, basement or utility room.
● Determine the breaker that serves your light switch that you are replacing.
● Turn off the applicable breaker to disconnect power from the circuit.
● For safety, flick the light switch to make sure it is off.
Remove the Switch Plate
● Unscrew the screws with a flathead screwdriver to release the switch plate.
● Carefully remove the switch plate from the wall.
● If the plate is stuck because of the paint, use the tip of a utility knife to break the seal.
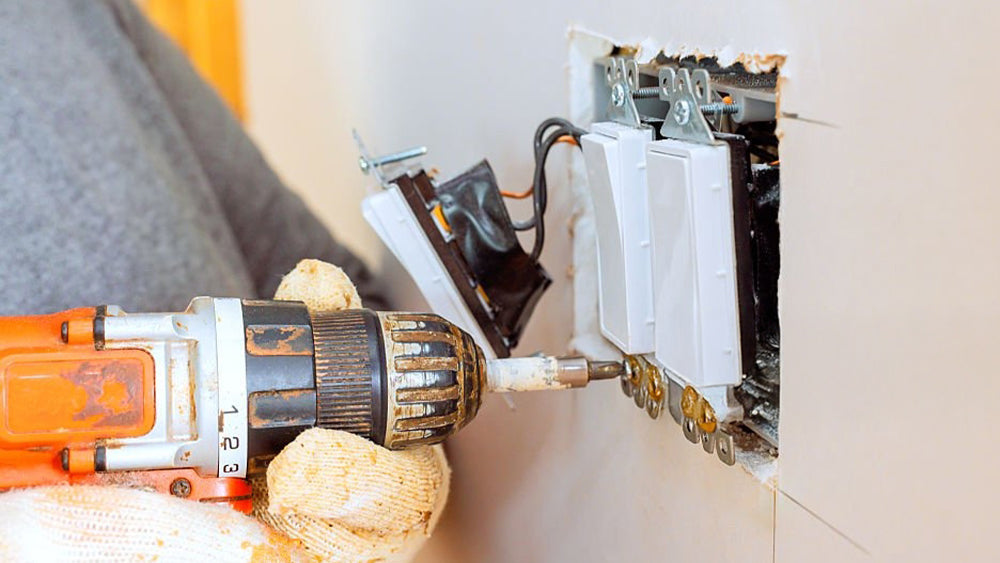
Unscrew and Extract the Switch
● Find the screws holding the switch to the electric box.
● Remove these screws with a screwdriver.
● Gently extract the switch from the wall until you can see the wires attached.
● Just be very careful not to damage the wires when doing this.
Examine and Label the Wiring
● Look at how the wires are attached to the old switch.
● Usually you will find a black (hot) wire connected to a brass screw and a white (neutral) wire connected to a silver screw.
● A green or bare copper wire serves as the ground and is connected to a green screw.
● If they're not color-coded, or you're in doubt, use masking tape to label them to avoid confusion when connecting them back together.

Disconnect the Wires
● Unscrew the switch's terminal screws to free the wires.
● If wired looped around screws check, note the direction of the loop before removing them.
● Identify and remove each wire from the old light switch.
● Make sure the wires did not pull back into the box.
Prepare the New Switch
● If necessary, strip about ½ inch of insulation from the ends of the wires to expose fresh copper.
● Use the needle-nose pliers to make a clockwise loop on the end of each wire.
● This loop should wrap around the screw terminal two-thirds to three-quarters of the way.
● Verify that the new switch is the same type (single-pole or three-way) as the old switch.
Connect the Wires to the New Switch
● Attach the black (hot) wire to the brass screw terminal.
● Connect the white (neutral) wire to the silver screw terminal.
● Secure the green or bare copper (ground) wire to the green screw terminal.
● Tighten all screws securely to ensure a solid connection.
Install the New Switch
● Carefully tuck the connected wires back into the electrical box.
● Align the new switch with the screw holes in the box.
● Secure the switch in place by tightening the mounting screws.
● Ensure the switch is oriented correctly, with the "ON" and "OFF" markings readable.
Attach the Wall Plate
● Place the switch plate over the switch.
● Insert and tighten the screws to secure the plate to the wall.
● Ensure the plate sits flush against the wall and that the switch operates smoothly.
Restore Power and Test the Switch
● Return to the circuit breaker panel and turn the breaker back on.
● Test the new switch by toggling it to ensure the connected light or fixture operates correctly.
● If the light doesn't function as expected, double-check the wiring connections.
● If issues persist, consult a professional electrician for assistance.
Once you’ve installed your new switch, it’s also a good opportunity to enjoy upgraded lighting. Consider pairing it with ComiLED canless recessed lighting with Night Light for a dual-mode experience—functional brightness by day and soft comfort light at night.

FAQs
Can I replace a light switch myself?
Yes, you can change a light switch if you take the proper safety precautions. But if you're uncertain and it makes you nervous, it's smart to hire a licensed electrician to install it for you.
Is replacing a light switch hard?
For the average DIYer, replacing a light switch can take little time. It's not something you handle without taking precautions for safety, but the process is simple. New users should adhere strictly to instructions or consult professionals if they have any questions.
Is it safe to replace a light switch?
Yes, it is safe to replace a light switch if you turn off the breaker and use the proper tools. Always make sure the power is off before beginning and if you have any doubts or aren't experienced, consult a professional.
Conclusion
Changing a light switch is an easy job that you can do yourself and can save you money and time. If you've taken the precautions and know the type of switch you have, you can do it yourself. Always turn off the power before starting and check your wiring connections!
Choosing energy-efficient options from Wholesale LED suppliers can enhance both the look and performance of your space—especially when paired with modern switches and dimmers.
Read more:
Share:
What Color Light is Best for Sleep
How to Clean Lamp Shade